Restore Hyper-V
Restore all backed up virtual machines instantly to the virtual environment.
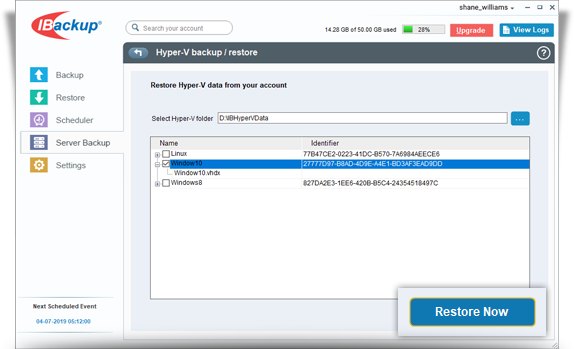
To restore Hyper-V virtual machines,
- Login to the IBackup application and click the Restore tab.
- Locate and select the 'IBHyperVData' folder in your IBackup account.
- Click the 'Restore Now' button, to restore the 'IBHyperVData' folder to the local computer.
- Once the 'IBHyperVData' folder has been successfully restored, click the 'Server Backup' tab.
- In the Hyper-V section, click ‘Restore’.
- Select the virtual machines you want to restore to your Hyper-V server.
- Browse and select the 'IBHyperVData' folder from your local computer (the location where the 'IBHyperVData' folder was restored earlier from your IBackup account).
- The Hyper-V backup/restore screen is displayed.
- Click the 'Restore Now' button to restore the virtual machine to the Hyper-V server.
- Click Yes, in the confirmation window to commence Hyper-V restore.
View the steps to backup Hyper-V.