Backup Microsoft SQL Server
Secure backup of your company's running databases; options to schedule backups, receive notifications and view log reports
To perform differential backup of your MS SQL Server,
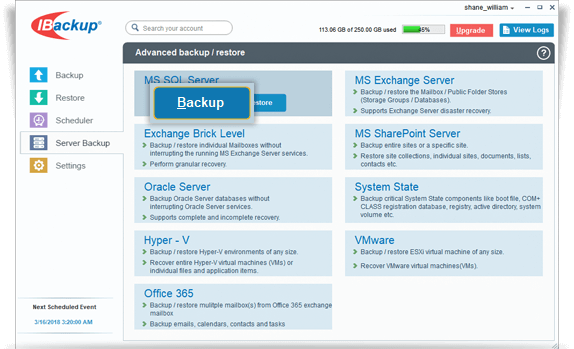
- Log in to the IBackup application and click the ‘Server Backup’ tab.
- Under MS SQL Server section, click 'Backup'.
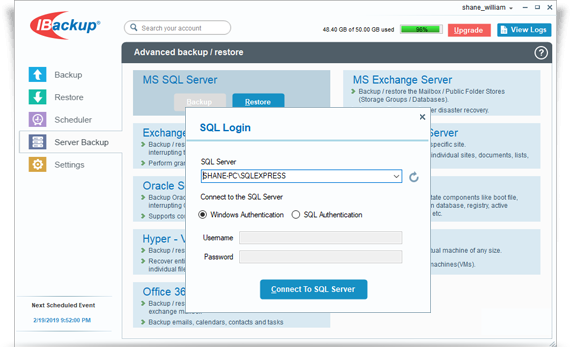
- Provide the relevant authentication information when prompted. IBackup provides two modes of MS SQL Server authentication.
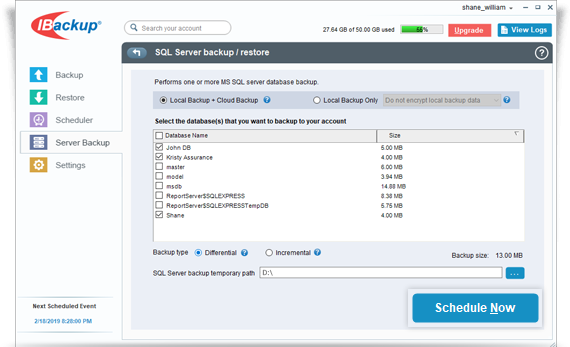
- Select the 'Local Backup + Cloud Backup' or the 'Local Backup Only' radio button.
- Select the database(s) from the list displayed, specify the temporary local backup path.
- Click 'Schedule Now'.
- The 'Schedule backup' screen is displayed where you can schedule the backup for any future day and time or perform an immediate backup of the selected databases.

Note: IBackup for Windows allows you to schedule the SQL Server backup for different instances. For easy identification of the SQL Server Backup set, the name of the Backup set will be 'IBSQLServerBkset' followed by the instance name scheduled for backup. Example: If the instance name is 'MJOHN\INSTMJOHN' then the name of the backup job is 'IBSQLServerBkset (MJOHN##INSTMJOHN)'
To perform incremental backup of your MS SQL Server,
- Log in to the IBackup application and click the 'Server Backup' tab.
- Under MS SQL Server section, click 'Backup'.
- Provide the relevant authentication information when prompted. IBackup provides two modes of MS SQL Server authentication.
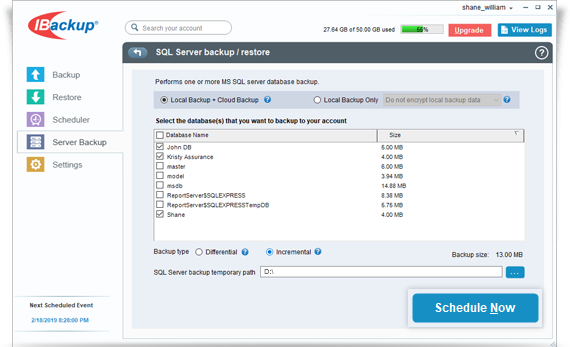
- Select the 'Local Backup + Cloud Backup' or the 'Local Backup Only' radio button.
- Select the database(s) from the list which appears and select the 'Incremental’ option.
Note: To perform the incremental backup, database should be in Full / Bulk-logged recovery model.
- Specify the local backup location and click 'Schedule Now'.
- In the 'Schedule backup' screen that appears, schedule the backup for any future day and time or perform an immediate backup of the selected databases.
- Click 'Save Changes'.
View the steps to restore the MS SQL Server.