Web-Based Backup set/Schedule Management
Manage your Default Backup set, schedule backups and view detailed logs via any browser
Follow the steps given below to manage the Default Backup set and schedule backups via any web browser
Quicklinks:
- Manage your Backup set and Scheduled jobs
- Add data to Default Backup set
- Delete data from the Default Backup set
- Schedule a Backup
- View Session Log
Manage your Backup set and Scheduled jobs
Login to your IBackup account via any web browser and click the 'Remote Manage' icon.
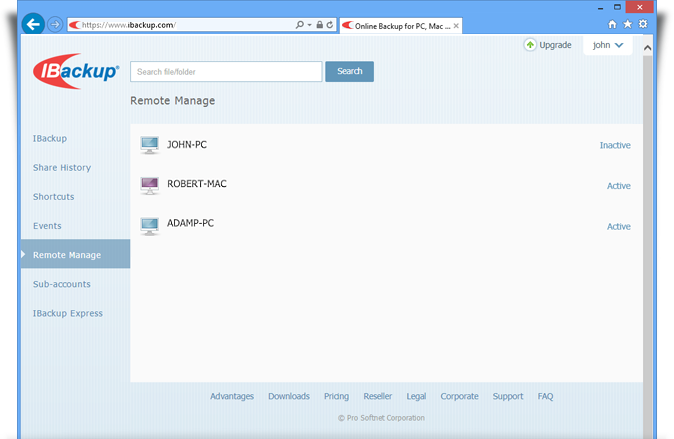
You can perform the following functions:
Add data to Default Backup set
Follow the steps given below to add files/folders to your Default Backup set:
1. Select the files/folders to be backed up, using the check boxes. The selected files/folders are displayed under the 'Contents of Default Backup set' section.
2. Click 'Update Default Backup set' to update your Backup set.
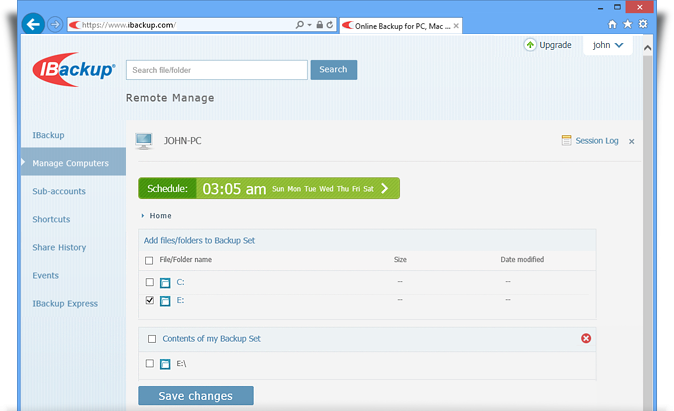
Delete data from the Default Backup set
Follow the steps given below to delete the data from your Backup set:
1. Under the 'Contents of Default Backup set' section, clear the check boxes for the files/folder that you wish to remove from your Backup Set.
2. Click 'Update Default Backup set' to update the Backup set.
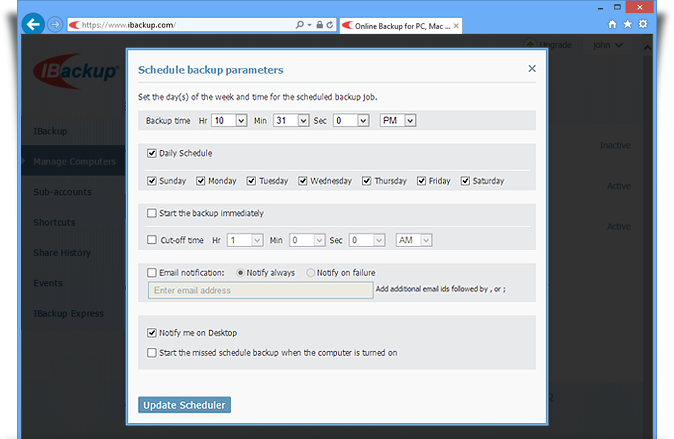
Schedule a Backup
Follow the steps given below to schedule the backup of your files/folders for particular days, time and frequency:
1. Click the 'Schedule Manager' button. The screen with configurable scheduling parameters is displayed.
2. Select the backup date, time, frequency and notification type among other options.
3. Click 'Update Scheduler' to update the scheduled backup details.
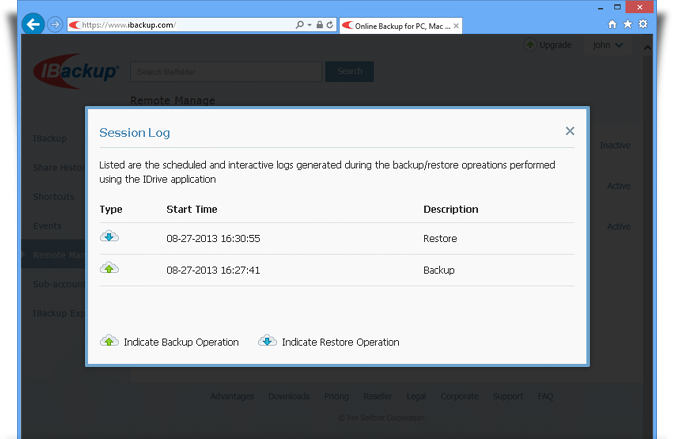
View Session Log
This option lists the log files created for each of your backup and restore sessions.
Follow the steps given below to view the session log:
1. Click the 'View Session Log' button. The list of session logs are displayed.
2. Click the specific session log that you want to view. The 'File download' dialog box is displayed.
3. Click 'Open' to view the log, 'Save' to save the log file on your computer or 'Cancel' to cancel it.
Note: The Web Management option is enabled by default in the IBackup for Windows application. You can disable this option from the IBackup for Windows Monitor tray menu.