Option 1:
Restore the MS Exchange Server databases from your IBackup Professional account to the MS Exchange Server.
Access the 'Exchange Server Restore' option from the application menu:
Backup-Restore > Exchange Server > Exchange Server Restore.
Step 1
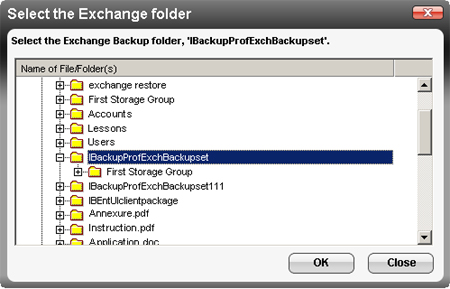
Select the Exchange Backup folder 'IBackupProfExchBackupset' from your IBackup Professional account.
To restore even a single Storage Group or database, you must restore the complete Exchange Backup folder named 'IBackupProfExchBackupset' from your IBackup Professional account.
Step
2
Select a folder on your local computer as a destination to restore the Exchange Backup folder 'IBackupProfExchBackupset'.
Step
3
Click the 'Restore' button available on the
'Restore Wizard Confirmation' screen to initiate the restore
operation of the Exchange Backup folder named
'IBackupProfExchBackupset' on your local computer.
Step 4
On restoring the Exchange Backup folder to your local computer, the following 'Exchange Server Restore' screen is displayed. 'Browse' to select a temporary location to hold the MS Exchange Server related files to run the 'Hard Recovery'.

Select the required databases and click
the 'Restore' button to initiate the MS Exchange Server restore
operation. The restore process (restore from local computer to MS
Exchange Server) will take some time (depending upon your restore
file size). It is best not to interrupt
the operation.
On successful completion
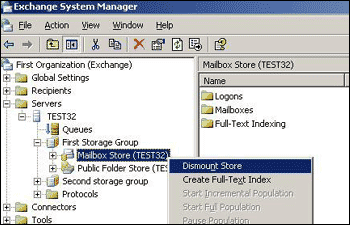
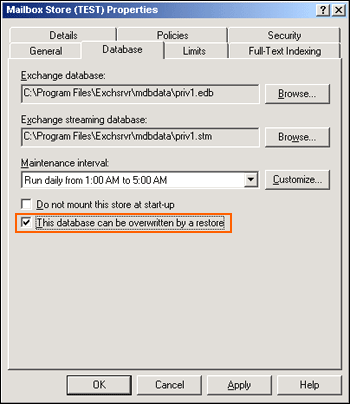
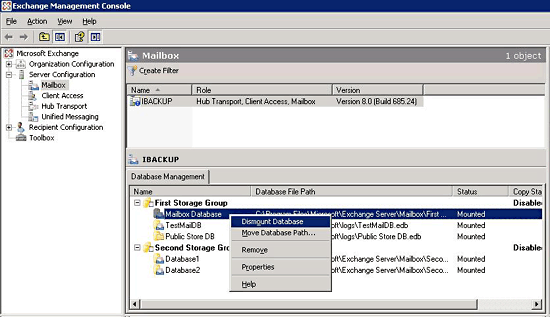
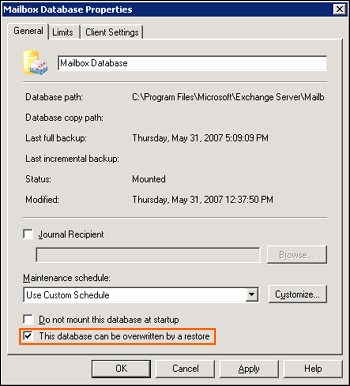
of MS Exchange Server restore, the restored databases (the 'Public
Folder Store' / 'Mailbox Store') would be automatically mounted.
Option 2
Restore the MS Exchange Server databases backup from your local computer to the MS Exchange Server.
Access the 'Exchange Server Restore' option from the application menu:
Backup-Restore > Exchange Server > Exchange Server Restore.
Step 1
Select the option 'Restore Exchange Server database backup from your 'local computer' to the MS Exchange Server. Click the 'Next ' button to access the 'Exchange Server Restore' screen.
Step 2
'Browse' to select the IBackup Professional Exchange Backup folder named 'IBackupProfExchBackupset' from your local computer (the location where the Exchange Server backup folder 'IBackupProfExchBackupset' was restored earlier from your IBackup Professional account).
Step 3
Browse to select a temporary location to store
the
MS Exchange Server related files, which are used to run the
'Hard Recovery' during the restore operation.
Step 4
Now, select the
required databases and click the 'Restore' button to initiate the
MS Exchange Server restore operation. The restore process (from the local computer to the MS Exchange Server) will take
some time depending on the size of the file to be restored.
It is best not to interrupt the
operation.
On successful completion of
MS Exchange Server restore, the restored databases (the 'Public
Folder Store' / 'Mailbox Store)' would be automatically mounted.