Backup
Backup your Microsoft 365 Mailbox data to your IBackup account and avoid data loss.
To backup your Microsoft 365 exchange mailbox,
1. After logging in to the IBackup application, navigate to the Server Backup tab.
2. Click Backup, under Microsoft 365.
3. Select global administrator to login.

4. From the list, choose the mailbox(es) that you want to backup.
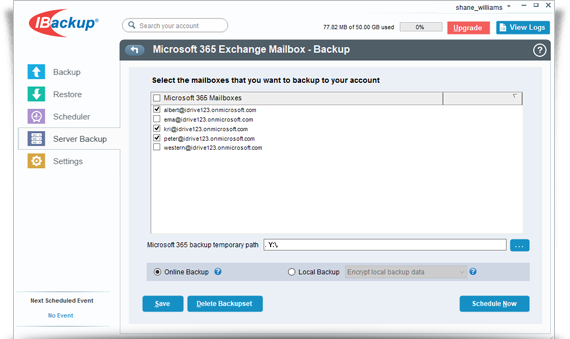
5. Enter the temporary local backup path and click Schedule Now.
Note: Ensure that the selected temporary location on your computer has adequate space to store the contents of individual mailboxes. You cannot select a temporary location on the remote location.
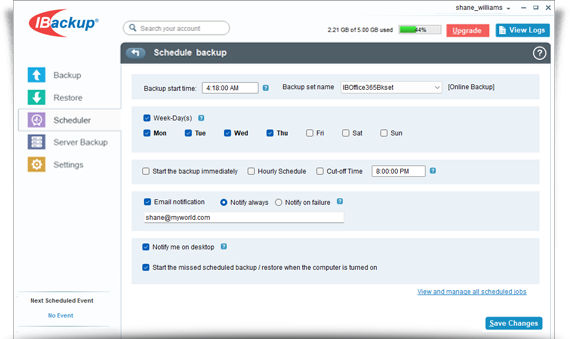
6. The Schedule backup screen appears. You can schedule backups for your mailbox data or perform an immediate backup.